每天推荐一个 GitHub 优质开源项目和一篇精选英文科技或编程文章原文,欢迎关注开源日报。交流QQ群:202790710;电报群 https://t.me/OpeningSourceOrg
今日推荐开源项目:《使用 x64dbg 进行反汇编》
推荐理由:x64dbg是一个调试器,可全功能调试 dll 和 exe 文件。
下载地址:https://github.com/x64dbg/x64dbg/releases
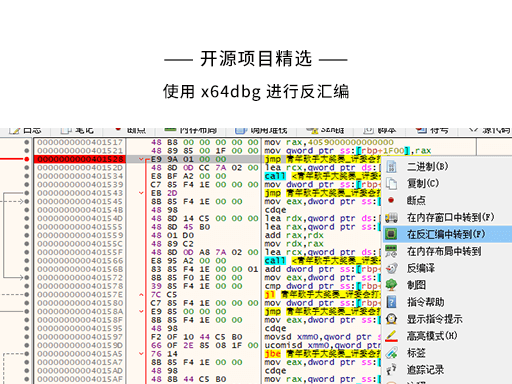
解压后运行release\x96dbg.exe,根据程序的类型选择对应的dbg。哪怕不知道该选哪个也没关系,你可以随便选一个,然后用它去打开你想要逆向的程序,如果不是对应的程序,会在程序的下方给出提示。
![]()
基本功能:
1、控制软件运行
调试器的最基本功能就是将一个飞速运行的程序中断下来,并且使其按照用户的意愿执行。调试器是靠迫使目标程序触发一个精心构造的异常来完成这些工作的。
2、查看软件运行中信息
查看软件的当前信息,这些信息包含但不限于当前线程的寄存器信息,堆栈信息、内存信息、当前 EIP 附近的反汇编信息等。
3、修改软件执行流程
修改内存信息、反汇编信息、堆栈信息、寄存器信息等等。
组成:
该调试器由三大部分组成:
- DBG
- GUI(这款调试器的图形界面是基于Qt的)
- Bridge
简介:
这个软件与 OD 一样是开源软件,熟悉 OD 的一定会发现,这款软件的界面与 OD 的界面极其的相似,当然也有着与 OD 相同的功能。鉴于 OD 已经好几年没有更新,是时候试试这款可以反汇编64位文件的软件了(ps:软件本身就有中文版哦)。
它有着更加清晰的颜色区分,并且背后的团队还在不断的更新中哦(越来越多的插件)
直接把要调试的文件拖进来!它的操作几乎与 OD 相同,再加上中文的界面,还是十分友好的。
基本操作:
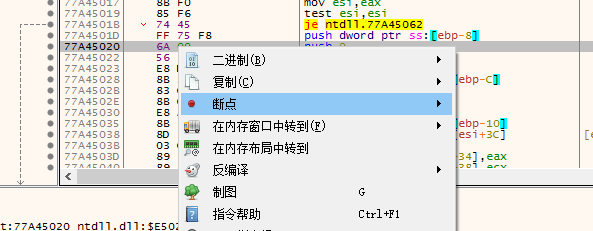
- 下断点
F2 或者右键而且在 x64dbg 里你还可以直接点左边的小灰点
- 搜索字符串

- 修改完成后就保存吧
本人对反编译以及汇编这个方面并不擅长,因此选择把自己写的小程序拿来分析,将汇编指令跟源代码进行比对。以下是测试的结果。
程序的初始化会占用大量的汇编指令,而这部分是我们平时写程序时看不到的。
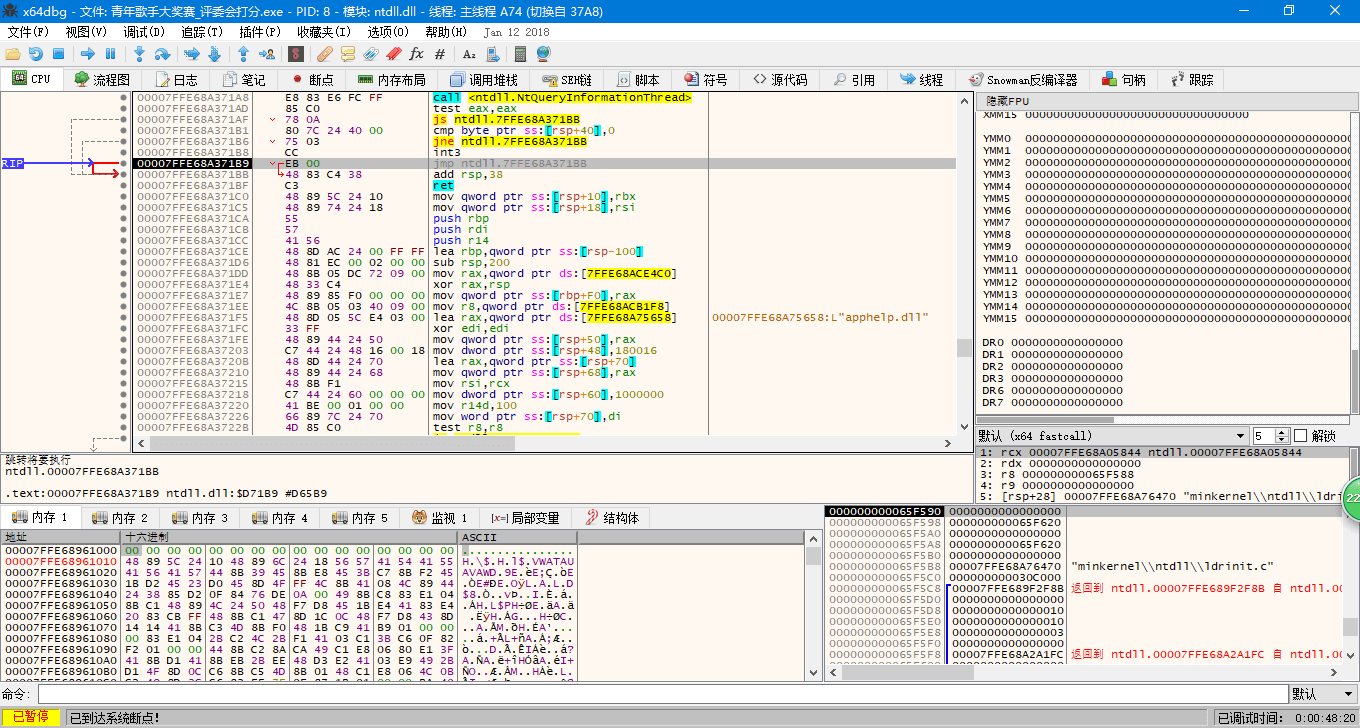
初始化完成后的启动位置会被注释为 EntryPoint 。
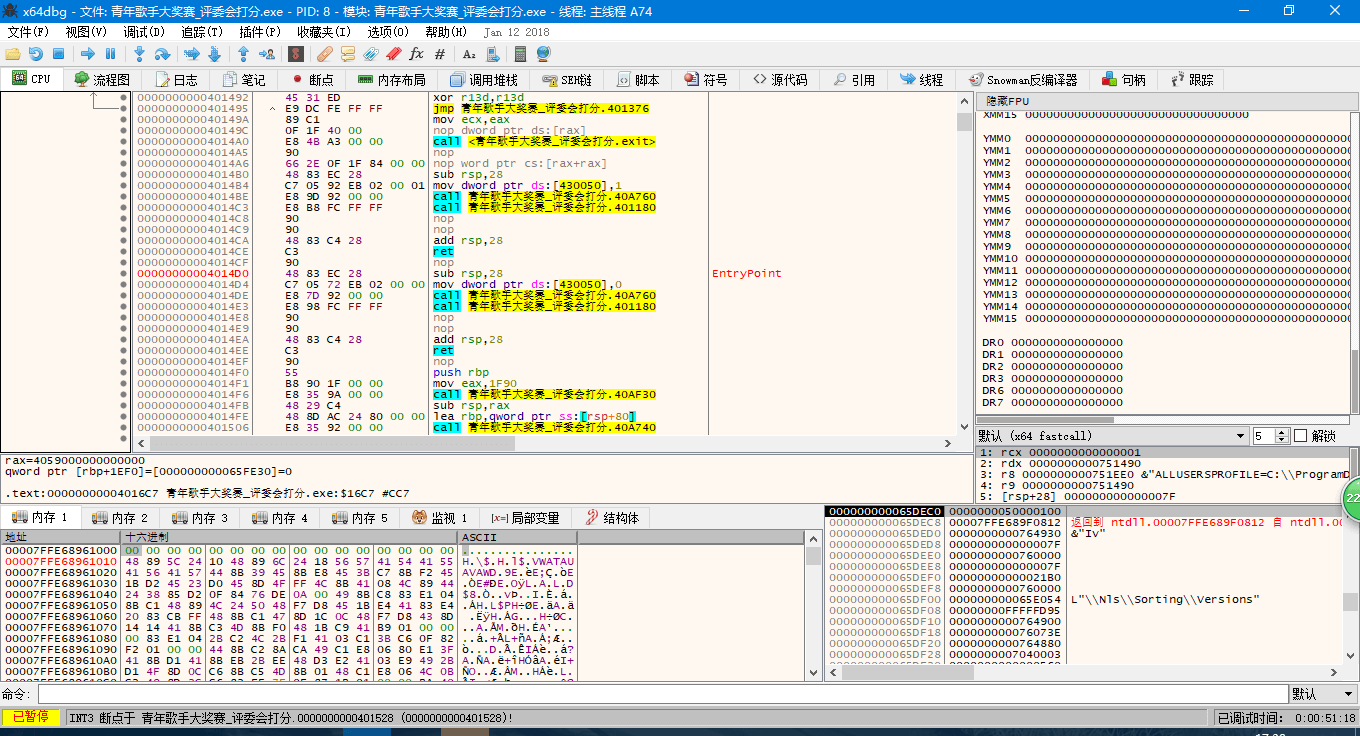
之后开始脚本正文。
前两句是初始化数组 array[] 与计数变量 n , i 等,这里略过。
之后会运行如下代码:
<while(scanf("%d",&n)!=EOF)

{
      ……………………
}>
是的,这是一道 ACM 的题,因为很简单所以拿来分析也方便一点……
对于这个结构,汇编代码给出的解释如下:
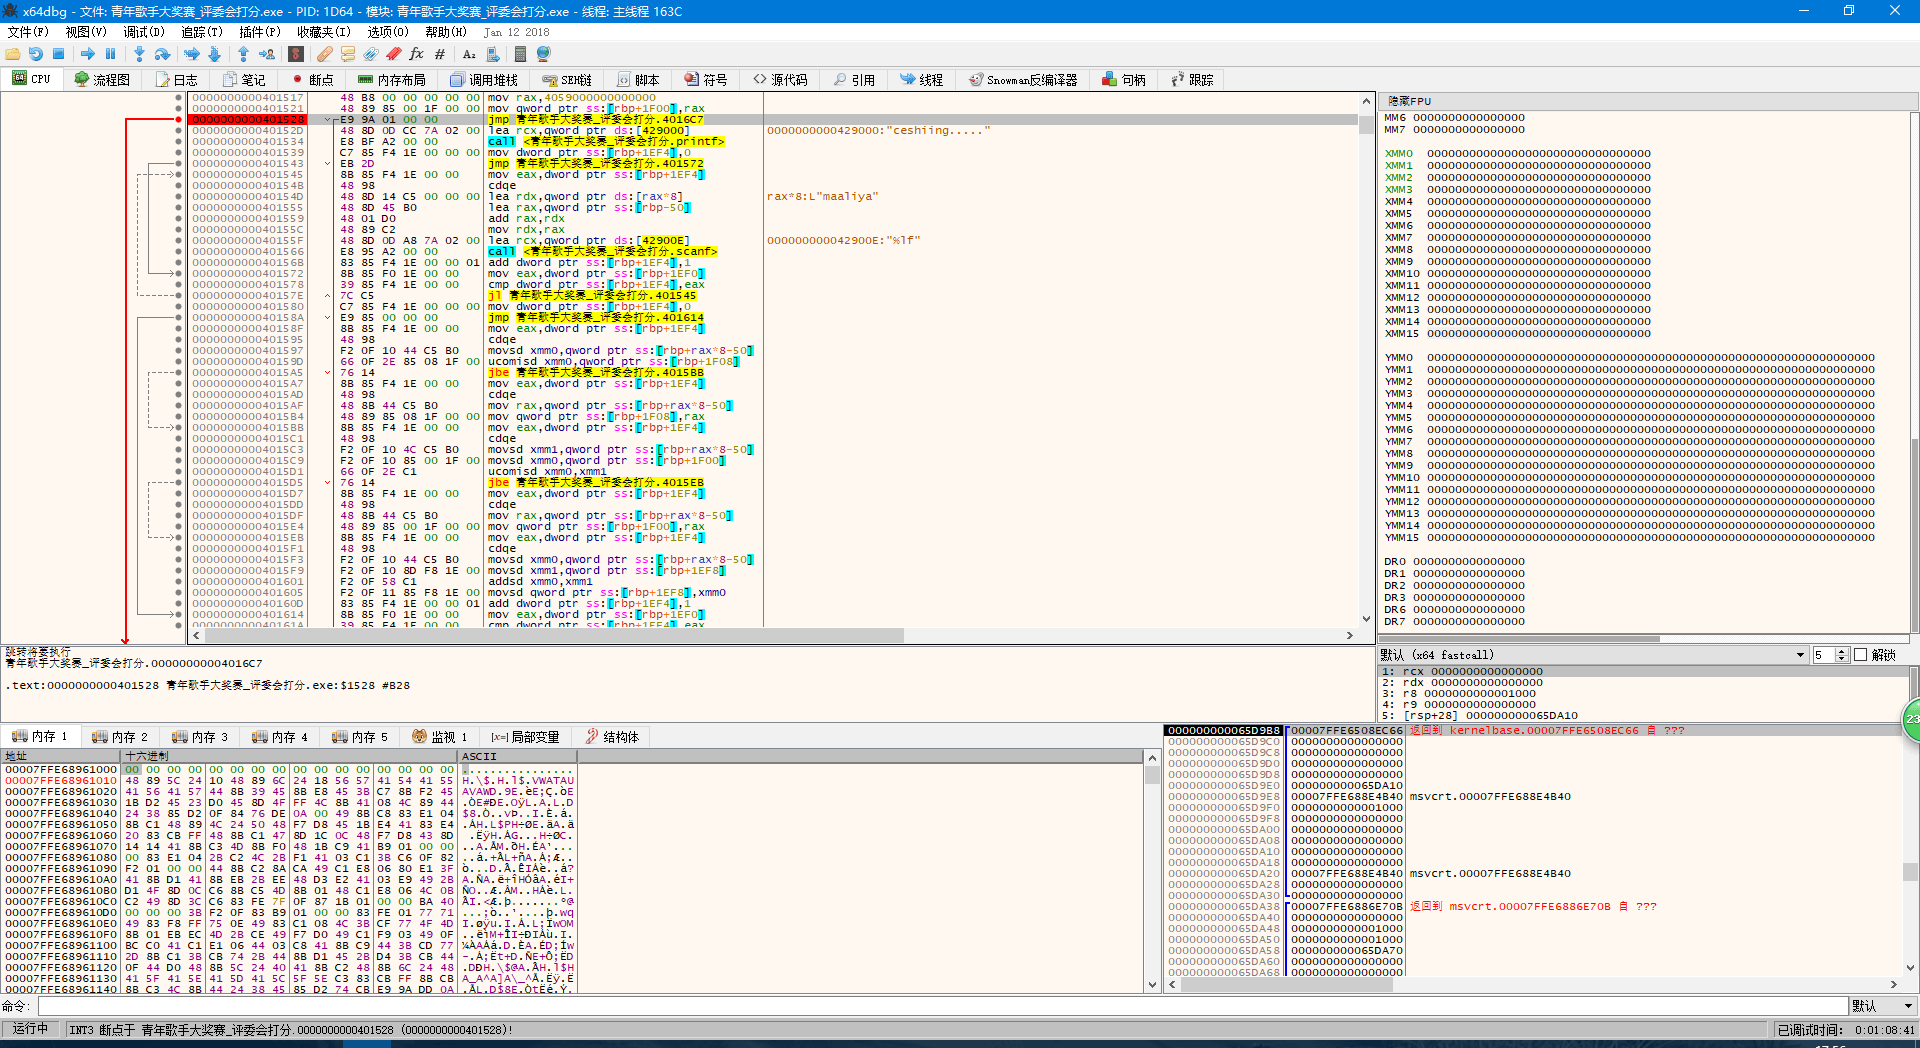
箭头指向的地方就是 while() 里的判定,让我们跟过去。
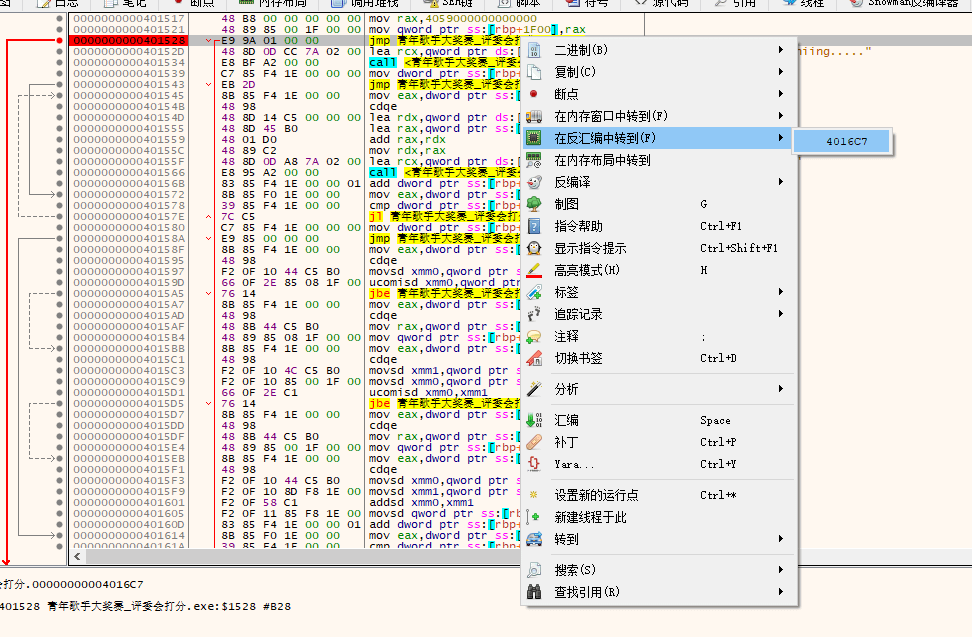
大家都看见了左边有个指向上方的灰色箭头,不用说也知道是指向回刚刚的判断条件之后的内容。实际上在这里汇编代码的逻辑是很清晰的,一层层调用起来,一层层返回,与函数有异曲同工之妙。例如这里会调用 scanf 函数,在你输入了之后又会经过重重代码,最后到达的指令就是 scanf 指令的下一条指令。
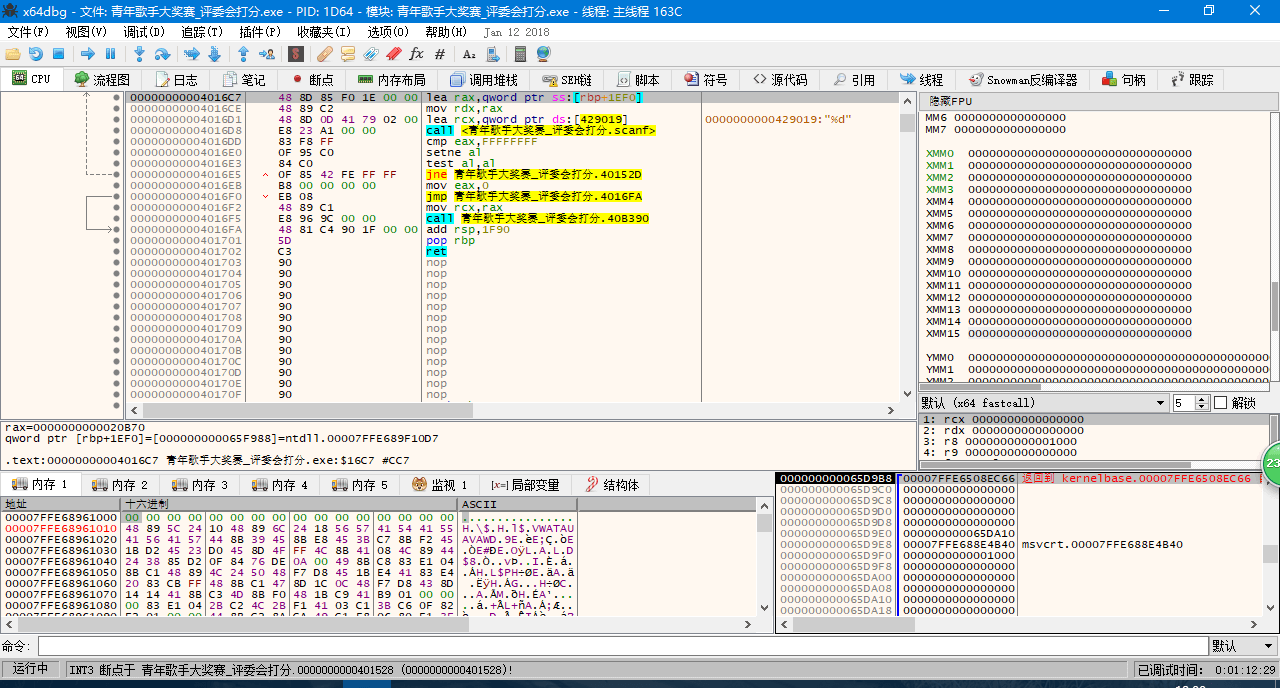
将输入的整型数据处理完毕并进行判断以后,寄存器回到 while 循环区,并开始执行循环内的第一条代码。
< printf("ceshiing.....");>
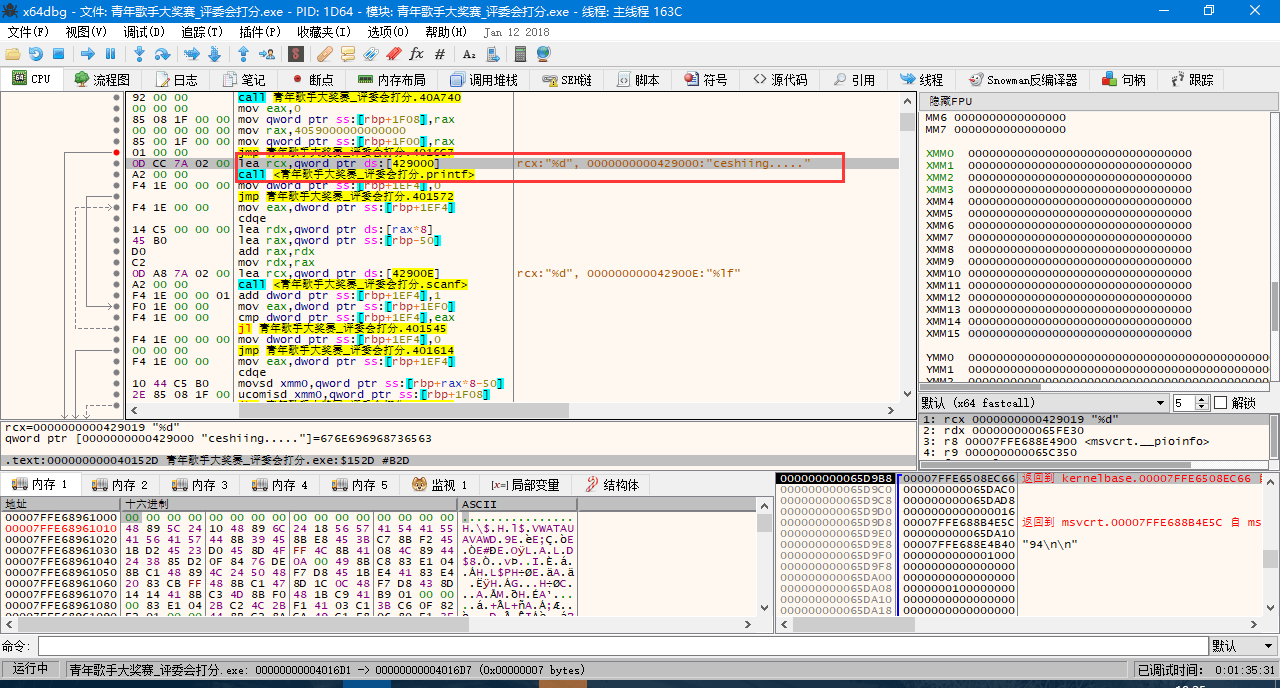
x64dbg 显示有两条命令处理这个函数,第一个是获取显示内容,第二个是执行显示,第二个还会调用大量的汇编指令,这里不多加赘述。
接下来是两个 for 循环与 if 判断语句:
< for(i=0;i<n;i++){scanf("%lf",array+i);}

                 for(i=0;i<n;i++)

                 {if(array[i]>nmax)nmax=array[i];

                  if(array[i]<nmin)nmin=array[i];

                  sum+=array[i];

                 }>
汇编指令中将这个过程非常直观地表示了出来。
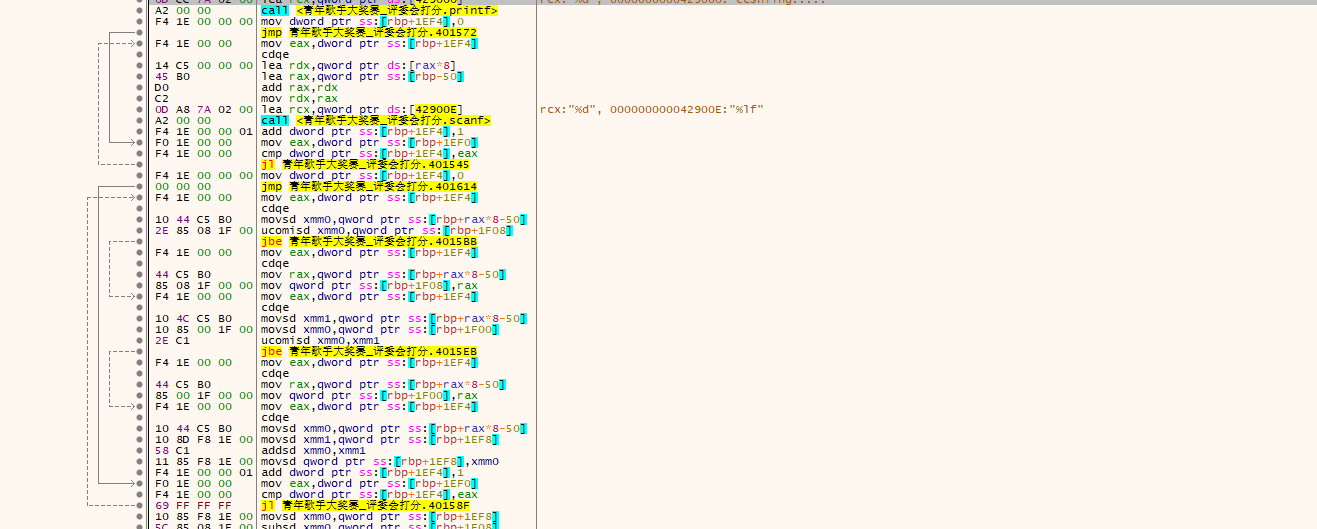
第一个循环用于输入每个评委给的分数。 jmp 无条件指令跳转, jl 按找参数的正负符号跳转, jl 的前一条 cmp 将两个值相减,用来给 jl 是否跳转提供依据。
第二个循环用于寻找最大值与最小值。可以从结构看出, if 语句中满足条件的话就 不会发生跳转。
最后执行以下代码,完成一次大循环:
< sum-=nmax,sum-=nmin;

                 sum=sum/(n-2);

                 printf("%.2lf\n",sum);

                 //初始化数据

                 nmax=0,nmin=100,sum=0;>
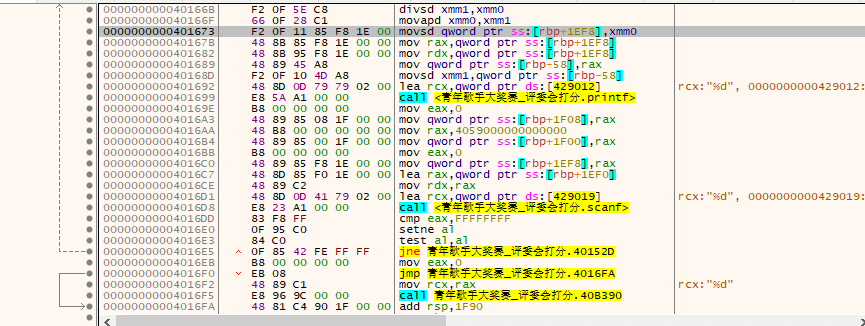
是不是很熟悉?又回到了最开始判定的地方。初始化完成后,就是判定,判定是的话又会返回 while 循环区的第一条代码……直到循环完成。再后面的汇编代码都是一些定义了,之前有许多 call 指令的目标便在这里被定义。包括 printf , scanf 都被封装在下面。
那么本次延展的主要内容就到这里结束了。汇编指令相较高级语言来说要晦涩许多,哪怕是以底层著称的C语言译转为汇编指令以后依旧会变得如此复杂。尽管这样,汇编指令也富有逻辑性。Call指令使程序变得模块化,使得C语言中连续的内容不会被分散。简洁的跳转指令构成了完善清晰的循环结构。我们可以看出,程序的代码部分会集中在一个小区域,也就是 EntryPoint 之后的一部分内容,这位我们解析代码提供了便利。对程序的逆向或破解有兴趣的同学可以去看看网上更多的与此相关的内容哦,这篇文章仅供简介这个程序的解析过程的入门。
最后是我们可爱的开发人员们:
mrexodia
Sigma
tr4ceflow
Dreg
Nukem
Herz3h
Torusrxxx
以及贡献者们:
blaquee
wk-952
RaMMicHaeL
lovrolu
fileoffset
SmilingWolf
ApertureSecurity
mrgreywater
Dither
zerosum0x0
RadicalRaccoon
fetzerms
muratsu
ForNeVeR
wynick27
Atvaark
Avin
mrfearless
Storm Shadow
shamanas
joesavage
justanotheranonymoususer
gushromp
Forsari0
今日推荐英文原文:《Simple Cloud Hardening》原作者:Kyle Rankin
原文链接:https://www.linuxjournal.com/content/simple-cloud-hardening
推荐理由:如果你打算把 Linux 操作系统作为云端服务器的话,怎么可以加固系统防止入侵、保障安全和隐私呢?这篇文章提供了一个简单可行的操作方法。
Simple Cloud Hardening

Apply a few basic hardening principles to secure your cloud environment.
I’ve written about simple server-hardening techniques in the past. Those articles were inspired in part by the Linux Hardening in Hostile Networks book I was writing at the time, and the idea was to distill the many different hardening steps you might want to perform on a server into a few simple steps that everyone should do. In this article, I take the same approach only with a specific focus on hardening cloud infrastructure. I’m most familiar with AWS, so my hardening steps are geared toward that platform and use AWS terminology (such as Security Groups and VPC), but as I’m not a fan of vendor lock-in, I try to include steps that are general enough that you should be able to adapt them to other providers.
New Accounts Are (Relatively) Free; Use Them
One of the big advantages with cloud infrastructure is the ability to compartmentalize your infrastructure. If you have a bunch of servers racked in the same rack, it might be difficult, but on cloud infrastructures, you can take advantage of the technology to isolate one customer from another to isolate one of your infrastructure types from the others. Although this doesn’t come completely for free (it adds some extra overhead when you set things up), it’s worth it for the strong isolation it provides between environments.
One of the first security measures you should put in place is separating each of your environments into its own high-level account. AWS allows you to generate a number of different accounts and connect them to a central billing account. This means you can isolate your development, staging and production environments (plus any others you may create) completely into their own individual accounts that have their own networks, their own credentials and their own roles totally isolated from the others. With each environment separated into its own account, you limit the damage attackers can do if they compromise one infrastructure to just that account. You also make it easier to see how much each environment costs by itself.
In a traditional infrastructure where dev and production are together, it is much easier to create accidental dependencies between those two environments and have a mistake in one affect the other. Splitting environments into separate accounts protects them from each other, and that independence helps you identify any legitimate links that environments need to have with each other. Once you have identified those links, it’s much easier to set up firewall rules or other restrictions between those accounts, just like you would if you wanted your infrastructure to talk to a third party.
Lock Down Security Groups
One advantage to cloud infrastructure is that you have a lot tighter control over firewall rules. AWS Security Groups let you define both ingress and egress firewall rules, both with the internet at large and between Security Groups. Since you can assign multiple Security Groups to a host, you have a lot of flexibility in how you define network access between hosts.
My first recommendation is to deny all ingress and egress traffic by default and add specific rules to a Security Group as you need them. This is a fundamental best practice for network security, and it applies to Security Groups as much as to traditional firewalls. This is particularly important if you use the Default security group, as it allows unrestricted internet egress traffic by default, so that should be one of the first things to disable. Although disabling egress traffic to the internet by default can make things a bit trickier to start with, it’s still a lot easier than trying to add that kind of restriction after the fact.
You can make things very complicated with Security Groups; however, my recommendation is to try to keep them simple. Give each server role (for instance web, application, database and so on) its own Security Group that applies to each server in that role. This makes it easy to know how your firewall rules are being applied and to which servers they apply. If one server in a particular role needs different network permissions from the others, it’s a good sign that it probably should have its own role.
The role-based Security Group model works pretty well but can be inconvenient when you want a firewall rule to apply to all your hosts. For instance, if you use centralized configuration management, you probably want every host to be allowed to talk to it. For rules like this, I take advantage of the Default Security Group and make sure that every host is a member of it. I then use it (in a very limited way) as a central place to define any firewall rules I want to apply to all hosts. One rule I define in particular is to allow egress traffic to any host in the Default Security Group—that way I don’t have to write duplicate ingress rules in one group and egress rules in another whenever I want hosts in one Security Group to talk to another.
Use Private Subnets
On cloud infrastructure, you are able to define hosts that have an internet-routable IP and hosts that only have internal IPs. In AWS Virtual Private Cloud (VPC), you define these hosts by setting up a second set of private subnets and spawning hosts within those subnets instead of the default public subnets.
Treat the default public subnet like a DMZ and put hosts there only if they truly need access to the internet. Put all other hosts into the private subnet. With this practice in place, even if hosts in the private subnet were compromised, they couldn’t talk directly to the internet even if an attacker wanted them to, which makes it much more difficult to download rootkits or other persistence tools without setting up elaborate tunnels.
These days it seems like just about every service wants unrestricted access to web ports on some other host on the internet, but an advantage to the private subnet approach is that instead of working out egress firewall rules to specific external IPs, you can set up a web proxy service in your DMZ that has more broad internet access and then restrict the hosts in the private subnet by hostname instead of IP. This has an added benefit of giving you a nice auditing trail on the proxy host of all the external hosts your infrastructure is accessing.
Use Account Access Control Lists Minimally
AWS provides a rich set of access control list tools by way of IAM. This lets you set up very precise rules about which AWS resources an account or role can access using a very complicated syntax. While IAM provides you with some pre-defined rules to get you started, it still suffers from the problem all rich access control lists have—the complexity makes it easy to create mistakes that grant people more access than they should have.
My recommendation is to use IAM only as much as is necessary to lock down basic AWS account access (like sysadmin accounts or orchestration tools for instance), and even then, to keep the IAM rules as simple as you can. If you need to restrict access to resources further, use access control at another level to achieve it. Although it may seem like giving somewhat broad IAM permissions to an AWS account isn’t as secure as drilling down and embracing the principle of least privilege, in practice, the more complicated your rules, the more likely you will make a mistake.
Conclusion
Cloud environments provide a lot of complex options for security; however, it’s more important to set a good baseline of simple security practices that everyone on the team can understand. This article provides a few basic, common-sense practices that should make your cloud environments safer while not making them too complex.
每天推荐一个 GitHub 优质开源项目和一篇精选英文科技或编程文章原文,欢迎关注开源日报。交流QQ群:202790710;电报群 https://t.me/OpeningSourceOrg