• 开源镜像
  • 开源沙龙
  • 媛宝
  • 猿帅
  • 注册
  • 登录
  • 息壤开源生活方式平台
  • 加入我们

开源日报

  • 2018年5月10日:开源日报第63期

    10 5 月, 2018

    每天推荐一个 GitHub 优质开源项目和一篇精选英文科技或编程文章原文,欢迎关注开源日报。交流QQ群:202790710;电报群 https://t.me/OpeningSourceOrg


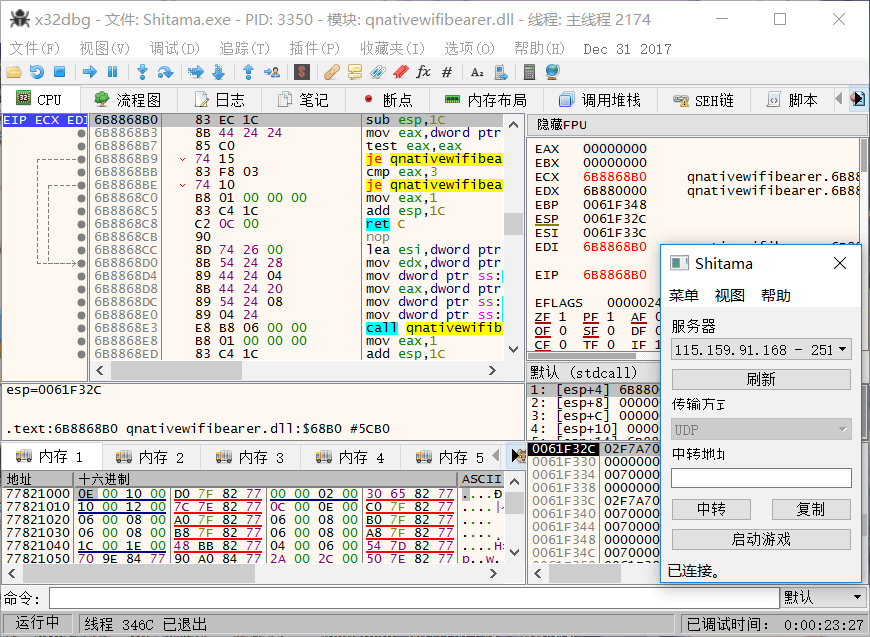
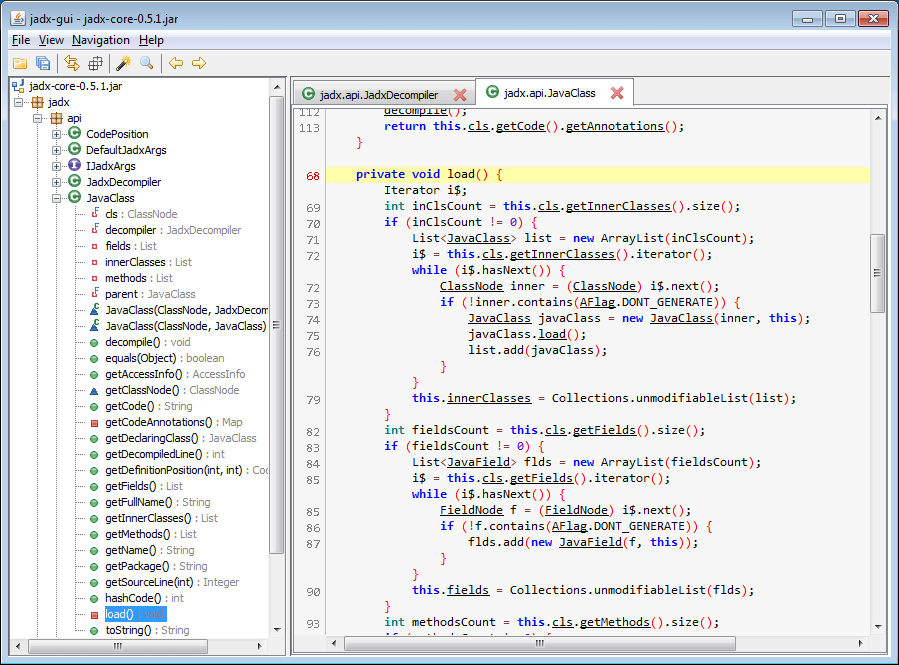
    今日推荐开源项目:《反编译神器 jadx》GitHub地址:https://github.com/skylot/jadx

    推荐理由:这是一个能够反编译二进制和APK文件的开源软件,同时拥有GUI和命令行两种操作方式。

    开源周报2018年第3期:反编译器上榜扎堆,JS库 Nerv 显神威

    用法:

    Windows下:来到build/jadx/bin目录下,双击jadx-gui.bat,然后选择要反编译的apk即可。

    命令行:把apk拷贝到bin目录下,命令行cd到bin目录下:键入jadx -d out xxx.apk会把编译后的源码丢到out目录下。

    开源周报2018年第3期:反编译器上榜扎堆,JS库 Nerv 显神威优势:
    1. 相比于传统的安卓反汇编方式(apktool+dex2jar+jd-gui)更加集成化。
    2. 可以直接导出项目源代码为Gradle项目,方便使用 Android Studio 再次开发。

    今日推荐英文原文:《Learn the basics of CSS in 5 minutes》作者:Per Harald Borgen

    原文链接:https://medium.freecodecamp.org/get-started-with-css-in-5-minutes-e0804813fc3e

    推荐理由:5分钟可以掌握九阳神功?不可以!但是5分钟真的可以掌握基本 CSS。

     Learn the basics of CSS in 5 minutes

    CSS (Cascading Style Sheets) is what makes web pages look good and presentable. It’s an essential part of modern web development, and a must-have skill for any web designer and developer.

    In this article, I’ll give you a quick introduction to help you getting started with CSS.

    Want to take our free CSS course? Click the image!

    I’m assuming that you have a basic understanding of HTML, but other than that there are no prerequisites for this tutorial.

    Getting Started

    Let’s start with learning how we can include CSS in our projects. There are typically three ways we do that.

    1. Inline CSS

    First off, we can include CSS directly in our HTML elements. For this, we make use of the style attribute and then we provide properties to it.

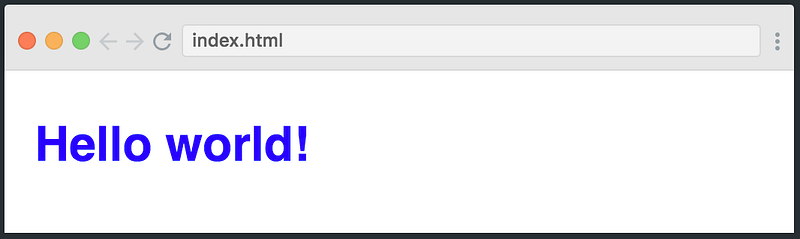
    <h1 style="color: blue"> Hello world! </h1>

    Here we’re giving it the property of color, and setting the value to blue, which results in the following:

    We can also set multiple properties inside the style tag if we wanted. However, I don’t want to continue down this path, as things start to get messey if our HTML is cluttered with lots of CSS inside it.

    This is why the second method to include CSS was introduced.

    2. Internal CSS

    The other way to include CSS is using the styleelement in the head section of the HTML document. This is called internal styling.

    <head>
        <style>
            h1 {
                color: blue;
            }
        </style>
    </head>

    In the style element, we can give the styling to our HTML elements by selecting the element(s) and provide styling attributes. Just like we applied thecolorproperty to the h1 element above.

    3. External CSS

    The third and most recommended way to include CSS is using an external stylesheet. We create a stylesheet with a .css extension and include its link in the HTML document, like this:

    <head>
        <link rel="stylesheet" href="style.css">
    </head>

    In the code above, we have included the link of style.css file using the linkelement. We then write all of our CSS in a separate stylesheet called style.css so that it’s easily manageable.

    //style.css
    h1 {
       color: blue;
    }

    This stylesheet can also be imported into other HTML files, so this is great for reusability.

    CSS Selectors

    As we discussed earlier, CSS is a design language which is used to style HTML elements. And in order to style elements, you first have to select them. You’ve already seen a glimpse of how this works, but let’s dive a bit deeper into CSS selectors, and look at three different ways you can select HTML elements.

    1. Element

    The first way to select an HTML element is by simply using the name, which is what we did above. Let’s see how it works:

    h1 {
        font-size: 20px;
    }
    p {
        color: green;
    }
    div {
        margin: 10px;
    }

    The example above is almost self-explanatory. We are selecting different elements like h1, p, div and giving them different style attributes. The font-size controls the size of the text, color sets the text color, and margin adds spacing around the element.

    2. Class

    Another way of selecting HTML elements is by using the class attribute. In HTML, we can assign different classes to our elements. Each element can have multiple classes, and each class can also be applied to multiple elements as well.

    Let’s see it in action:

    <div class='container'>
        <h1> This is heading </h1>
    </div>
    ...
    .container {
        margin: 10px;
    }

    In the code above, we have assigned the class of container to the div element. In the stylesheet, we select our class using .className format and giving it a 10px margin.

    3. ID

    Like classes, we can also use IDs to select HTML elements and apply styling to them. The only difference between class and ID is that one ID can be assigned to only one HTML element.

    <div>
        <p id='para1'> This is a paragraph </p>
    </div>
    ...
    #para1 {
        color: green;
        font-size: 16px;
    }

    The example above displays how we assign an ID to the paragraph element and later use the ID selector in the stylesheet to select the paragraph and apply the style to it.

    Fonts & Colors

    CSS provides us with literally hundreds of options for playing around with fonts and colors and making our HTML elements look pretty. We can choose from two types of font family names:

    1. Generic Family: a group of font families with a similar look (like ‘Serif’ or ‘Monospace’)

    2. Font Family: a specific font family (like ‘Times New Roman’ or ‘Arial’)

    For colors, we can use predefined color names, or RGB, HEX, HSL, RGBA, HSLA values.

    <div class='container'>
        <h1 class='heading1'>
            CSS is Coooooool!!!!
        </h1>
    </div>
    .............
    .container {
        width: 500px;
        height: 100px;
        background-color: lightcyan;
        text-align: center;
    }
    .heading1 {
        font-family: 'Courier New';
        color: tomato;
    }

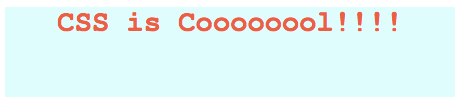
    As you can see in the above example, we have a div element with the class of container . Inside this div, there is an h1 tag with some text inside it.

    In the stylesheet, we select the container class and set its width, height, background-color, and text-align.

    Finally we select the .heading1 class — which is applied to the h1 tag — and give it the attributes of font-family and color.

    Conclusion

    You might feel a bit overwhelmed by all this information, but don’t worry.

    Just check out our free Intro to CSS course on Scrimba and you’ll be a web design ninja in less than an hour.

    Happy coding 🙂


    每天推荐一个 GitHub 优质开源项目和一篇精选英文科技或编程文章原文,欢迎关注开源日报。交流QQ群:202790710;电报群 https://t.me/OpeningSourceOrg

  • 2018年5月9日:开源日报第62期

    9 5 月, 2018

    每天推荐一个 GitHub 优质开源项目和一篇精选英文科技或编程文章原文,欢迎关注开源日报。交流QQ群:202790710;电报群 https://t.me/OpeningSourceOrg


    今日推荐开源项目:《用于 Windows 的调试器 x64dbg》GitHub地址:https://github.com/x64dbg/x64dbg

    推荐理由:一个为32位和64位 windows 系统准备的开源调试器。这个调试器在打开程序和程序启动的入口处都设置了断点,从而可以让使用者观察程序的状态,比如 CPU 的地址及其地址的内容;内存的地址,大小,页面信息,内容,类型等等等等。几乎可以让使用者在运行程序的同时完全的监视这个程序,还可以通过在程序中设置断点来进一步观察运行状态。

    开源周报2018年第3期:反编译器上榜扎堆,JS库 Nerv 显神威

    特点:

    1.可以全功能的调试 dll 和 exe 文件

    2.附带跳转箭头的 IDA 侧边栏和 IDA 指令标记笔

    3.可动态识别模块与字符串

    4.快速的反汇编程序

    5.拥有用于注释,标签等功能的用户数据库

    6.支持插件

    7.拥有可扩展,可调试的脚本语言,便于自动化


    今日推荐英文原文:《How a university network assistant used Linux in the 90s》

    作者: Alan Formy-Duval 原文链接:https://opensource.com/article/18/5/my-linux-story-student

    推荐理由:用着现代化的 GNOME 3,或者 Xfce 等桌面,你有想过20年前的 Linux 用户过着怎样的日子吗?如果你用 CLI 也许差别不大,不过呢,90年代是怎么使用,都用些什么?听听这位大叔的回忆吧。

    How a university network assistant used Linux in the 90s

    In the mid-1990s, I was enrolled in computer science classes. My university’s computer science department provided a SunOS server—a multi-user, multitasking Unix system—for its students. We logged into it and wrote source code for the programming languages we were learning, such as C, C++, and ADA. In those days, well before social networks and instant messaging, we also used the system to communicate with each other, sending emails and using utilities such as write and talk. We were each also allowed to host a personal website. I enjoyed being able to complete my assignments and contact other users.

    It was my first experience with this type of operating environment, but I soon learned about another operating system that could do the same thing: Linux.

    While I was a student, I also worked part-time at the university. My first position was as a network installer in the Department of Housing and Residence (H&R). This involved connecting student dormitories to the campus network. As this was the university’s first dormitory network service, only two buildings and about 75 students had been connected.

    In my second year, the network expanded to cover an additional two buildings. H&R decided to let the university’s Office of Information Technology (OIT) manage this growing operation. I transferred to OIT and started the position of Student Assistant to the OIT Network Manager. That is how I discovered Linux. One of my new responsibilities was to manage the firewall systems that provided network and internet access to the dormitories.

    Each student was registered with their hardware MAC address. Registered students could connect to the dorm network and receive an IP address and a route to the internet. Unlike the other expensive SunOS and VMS servers used by the university, these firewalls used low-cost computers running the free and open source Linux operating system. By the end of the year, the system had registered nearly 500 students.

    The OIT network staff members were using Linux for HTTP, FTP, and other services. They also used Linux on their personal desktops. That’s when I realized I had my hands on a computer system that looked and acted just like the expensive SunOS box in the CS department but without the high cost. Linux could run on commodity x86 hardware, such as a Dell Latitude with 8 MB of RAM and a 133Mhz Intel Pentium CPU. That was the selling point for me! I installed Red Hat Linux 5.2 on a box scavenged from the surplus warehouse and gave my friends login accounts.

    While I used my new Linux server to host my website and provide accounts to my friends, it also offered graphics capabilities over the CS department server. Using the X Windows system, I could browse the web with Netscape Navigator, play music with XMMS, and try out different window managers. I could also download and compile other open source software and write my own code.

    I learned that Linux offered some pretty advanced features, many of which were more convenient than or superior to more mainstream operating systems. For example, many operating systems did not yet offer simple ways to apply updates. In Linux, this was easy, thanks to autoRPM, an update manager written by Kirk Bauer, which sent the root user a daily email with available updates. It had an intuitive interface for reviewing and selecting software updates to install—pretty amazing for the mid-’90s.

    Linux may not have been well-known back then, and it was often received with skepticism, but I was convinced it would survive. And survive it did!


    每天推荐一个 GitHub 优质开源项目和一篇精选英文科技或编程文章原文,欢迎关注开源日报。交流QQ群:202790710;电报群 https://t.me/OpeningSourceOrg

  • 2018年5月8日:开源日报第61期

    8 5 月, 2018

    每天推荐一个 GitHub 优质开源项目和一篇精选英文科技或编程文章原文,欢迎关注开源日报。交流QQ群:202790710;电报群 https://t.me/OpeningSourceOrg


    今日推荐开源项目:《野生计科教材  Computer Science》GitHub 地址:https://github.com/ossu/computer-science

    推荐理由:想学电脑科学吗?这里有一个开源项目就是协作的资讯科学教材,特别适用于计科专业。教程并不局限于职业生涯或专业发展,也提供给那些想要关于计算机学科恰当的、面面俱到的基础的人,同时给那些有强烈愿望、兴趣想自己完成这个教育的人,提供一起学习讨论世界性范围的社区。

    开源周报2018年第2期:Hyperapp领风骚,Python带你跳一跳


    这些课程主要来自哈佛、普林斯顿、麻省理工等等,并被精挑细选出符合下列标准的教材:

    1. 对所有注册者开放;
    2. 定期进行;
    3. 符合OSSU的学术标准;
    4. 从普通到困难无缝衔接;
    5. 高质量且适于教学;

    注意事项:

    1. 如果你每周投入18-22小时学习,你大概可以在两年内学完
    2. 除开一小部分课程,大部分课程都是免费的
    3. 不要违背你在课程开始前签的条约
    4. 常见问题:https://github.com/ossu/computer-science/blob/master/FAQ.md
    5. 不常见问题来论坛:https://www.reddit.com/r/opensourcesociety/

    课前准备:

    1. 高中数学、物理基础
    2. 知道学哪个

    学习过程:

    1. 学习
    2. 欢迎团队合作
    3. 有期末考试(Final project)(可以使用任何语言)(为了让你学以致用,把知识运用到解决现实问题上)
    4. 学完后的评估(由老师、你的同伴、和有经验的人进行)
    5. 学习结束后你可以选择去工作,或阅读专业书籍再丰富自己,或参加当地同好者组织,以及关注世界上软件的发展。

    今日推荐英文原文:《How integrated, open infrastructure meets tomorrow’s computing demands》

    作者: Thierry Carrez    原文链接:https://opensource.com/article/18/5/open-infrastructure

    推荐理由:整合的开放式基础架构如何满足未来的计算需求呢?开放式基础架构的优点在于其灵活性:可以根据每个组织的特定需求添加解决方案,可以说是非常迷人了。

    How integrated, open infrastructure meets tomorrow’s computing demands

    Cloud infrastructure is quickly becoming an integral business component for nearly every company.

    By virtualizing physical compute, networking, and storage resources, the cloud model of computing makes it possible to transform data center resources—previously limited, expensive and difficult to provision for users in a timely way—into flexible, elastic and easily consumable resources. Applications developers love cloud because the infrastructure resources are available on demand and are programmatically accessible via APIs, which helps them innovate more quickly; they no longer have to worry about building or requisitioning the infrastructure to test and deploy their applications—they just consume it! Operators love cloud because it enables them to deliver more powerful services faster, more cost-efficiently, more securely and with high degrees of automation. CIOs love cloud because it leads to better utilization of resources and a reduction in total cost of ownership for infrastructure. CEOs love cloud because it makes their organizations more agile—able to innovate faster and respond more quickly to set themselves apart in a competitive marketplace.

    Needless to say, the cloud is popular for good reason, and enterprising companies are taking the lead in meeting the market demand with public cloud services. Three companies, in particular, have set themselves apart: Amazon Web Services, Microsoft Azure, and Google Cloud Platform together account for half of the global public cloud market. Increasingly, however, voices are being raised against the inevitability of a future in which all of the world’s infrastructure needs will be met by “The Big 3.”In fact, many large companies opt to deploy their own infrastructure rather than pay for the high margins of those Internet giants (who use those margins to finance their aggressive extension to new areas). Instead of essentially funding their own long-term extinction by paying for public cloud services, companies like Walmart, Best Buy, eBay, Paypal, AT&T, or Comcast have chosen a different path for their infrastructure needs.

    And they are not alone. Others have made the choice to resist the hegemony of The Big 3 by offering their own public cloud alternative in the form of local and interoperable clouds. This is the case with OVH in France, Deutsche Telekom in Germany, City Network in Sweden, and VEXXHOST in Canada.

    Likewise, in the area of scientific research, we find organizations where high-performance computing power is essential and every dollar must be used to the best advantage, and these institutions are opting to build their own infrastructure. CERN deployed an impressive private cloud (300,000 CPU cores, 800 Tb of RAM) to cost-effectively analyze the results of the Large Hadron Collider and other experiments. It’s now collaborating with other research institutions to build the compute and storage infrastructure for the Square Kilometer Array, an Earth-sized telescope expected to produce petabytes of data every day.

    In China, where everything is oversized and there is an inherent mistrust of American suppliers, the choice to build your own infrastructure for both enterprise and government use is a natural one. We already find such infrastructure supporting trains for China Railway, the payment system for China UnionPay, and telephone services for millions of China Mobile customers.

    To build their own infrastructure, these organizations are making a wise and strategic investment in the alternative to The Big 3: open infrastructure—combining the best programmable, flexible and interoperable open source software to build their own infrastructure. OpenStack provides the basis for this infrastructure, on which it is possible to deploy further cloud-native open source solutions like Kubernetes. Although developed by adjacent communities, these two solutions are being tested in collaboration with the various actors of the open infrastructure community to ensure compatibility.

    Open infrastructure makes good business sense. Leveraging openly developed, free, and open source software, organizations can:

    • Avoid vendor lock-in;
    • “See under the hood” and fully understand how it all works and how to optimize the system;
    • Develop innovative solutions to meet your own unique circumstances; and
    • Participate directly in the improvement of the software so that it will serve you even better in the future.

    The beauty of open infrastructure is its flexibility: solutions can be added according to each organization’s particular needs. Finally, the use of open solution standards makes the components of open infrastructure interoperable. The same APIs can be used on different deployments, allowing peer organizations to federate resources among different cloud environments, even to public clouds that have made the same choice of open infrastructure or use the same APIs.

    The era of open infrastructure is just beginning. Already, artificial intelligence (AI) is booming, with AI applications infiltrating more and more industries, leading to a rapidly increasing demand for compute-intensive infrastructure resources. Tomorrow, mobile applications (such as augmented reality applications) will require even more processing capacity and far less network latency, forcing organizations to push processing capacity as close as possible to the user who consumes it, i.e., to “the edge.” Thus we are witnessing the advent of edge computing, a bursting out of the traditional data center model to a more decentralized, distributed and efficient model. Only open infrastructure will meet the challenges of standardization and interoperability that this revolution will bring.


    每天推荐一个 GitHub 优质开源项目和一篇精选英文科技或编程文章原文,欢迎关注开源日报。交流QQ群:202790710;电报群 https://t.me/OpeningSourceOrg

  • 2018年5月7日:开源日报第60期

    7 5 月, 2018

    每天推荐一个 GitHub 优质开源项目和一篇精选英文科技或编程文章原文,欢迎关注开源日报。交流QQ群:202790710;电报群 https://t.me/OpeningSourceOrg


    今日推荐开源项目:《克隆帝国时代2 Genie引擎 openage》GitHub 地址:https://github.com/SFTtech/openage

    推荐理由:帝国时代2 Genie引擎的克隆,主要针对POSIX平台。它使用原版游戏的资源,因此,你可能需要原版的帝国时代2或者帝国时代2:征服者(通过wine或steam_linux安装)

    开源周报2018年第2期:Hyperapp领风骚,Python带你跳一跳

    当前目标:

    1.支持多人对战

    2.在原版游戏基础上做出提升,感兴趣可参考该页面:

    https://github.com/SFTtech/openage/tree/master/doc/ideas

    3.你可以让你的AI进行机器学习

    4.重建免费的游戏资源

    5.更易制作MOD的内容格式

    6.比blender更强的Python控制器与接口

    7.更好的感官体验

    小伙伴们的童年回忆!!!!

    开源周报2018年第2期:Hyperapp领风骚,Python带你跳一跳

    今日推荐英文原文:《A Beginners Guide To Cron Jobs》作者:SK

    原文链接:https://www.ostechnix.com/a-beginners-guide-to-cron-jobs/

    推荐理由:Cron 可以说是包括 Linux 在内的类 Unix 系统中最有用的几个工具之一了,它可以帮助你方便地管理一些周期性的任务。如何快速掌握这个工具?这篇文章是一个针对新手的小教程。

    A Beginners Guide To Cron Jobs

    Cron is one of the most useful utility that you can find in any Unix-like operating system. It is used to schedule commands at a specific time. These scheduled commands or tasks are known as “Cron Jobs”. Cron is generally used for running scheduled backups, monitoring disk space, deleting files (for example log files) periodically which are no longer required, running system maintenance tasks and a lot more. In this brief guide, we will see the basic usage of Cron Jobs in Linux.


    The Beginners Guide To Cron Jobs

    The typical format of a cron job is:

    Minute(0-59) Hour(0-24) Day_of_month(1-31) Month(1-12) Day_of_week(0-6) Command_to_execute

    Just memorize the cron job format or print the following illustration and keep it in your desk.

    In the above picture, the asterisks refers the specific blocks of time.

    To display the contents of the crontab file of the currently logged in user:

    $ crontab -l

    To edit the current user’s cron jobs, do:

    $ crontab -e

    If it is the first time, you will be asked to editor to edit the jobs.

    no crontab for sk - using an empty one
    
    Select an editor. To change later, run 'select-editor'.
     1. /bin/nano <---- easiest
     2. /usr/bin/vim.basic
     3. /usr/bin/vim.tiny
     4. /bin/ed
    
    Choose 1-4 [1]:

    Choose any one that suits you. Here it is how a sample crontab file looks like.

    In this file, you need to add your cron jobs.

    To edit the crontab of a different user, for example ostechnix, do:

    $ crontab -u ostechnix -e

    Let us see some examples.

    To run a cron job every minute, the format should be like below.

    * * * * * <command-to-execute>

    To run cron job every 5 minute, add the following in your crontab file.

    */5 * * * * <command-to-execute>

    To run a cron job at every quarter hour (every 15th minute), add this:

    */15 * * * * <command-to-execute>

    To run a cron job every hour at 30 minutes, run:

    30 * * * * <command-to-execute>

    You can also define multiple time intervals separated by commas. For example, the following cron job will run three times every hour, at minutes 0, 5 and 10:

    0,5,10 * * * * <command-to-execute>

    Run a cron job every half hour:

    */30 * * * * <command-to-execute>

    Run a job every hour:

    0 * * * * <command-to-execute>

    Run a job every 2 hours:

    0 */2 * * * <command-to-execute>

    Run a job every day (It will run at 00:00):

    0 0 * * * <command-to-execute>

    Run a job every day at 3am:

    0 3 * * * <command-to-execute>

    Run a job every sunday:

    0 0 * * SUN <command-to-execute>

    Or,

    0 0 * * 0 <command-to-execute>

    It will run at exactly at 00:00 on Sunday.

    Run a job on every day-of-week from Monday through Friday i.e every weekday:

    0 0 * * 1-5 <command-to-execute>

    The job will start at 00:00.

    Run a job every month:

    0 0 1 * * <command-to-execute>

    Run a job at 16:15 on day-of-month 1:

    15 16 1 * * <command-to-execute>

    Run a job at every quarter i.e on day-of-month 1 in every 3rd month:

    0 0 1 */3 * <command-to-execute>

    Run a job on a specific month at a specific time:

    5 0 * 4 * <command-to-execute>

    The job will start at 00:05 in April.

    Run a job every 6 months:

    0 0 1 */6 * <command-to-execute>

    This cron job will start at 00:00 on day-of-month 1 in every 6th month.

    Run a job every year:

    0 0 1 1 * <command-to-execute>

    This cron job will start at 00:00 on day-of-month 1 in January.

    We can also use the following strings to define job.

    @reboot Run once, at startup.
    @yearly Run once a year.
    @annually (same as @yearly).
    @monthly Run once a month.
    @weekly Run once a week.
    @daily Run once a day.
    @midnight (same as @daily).
    @hourly Run once an hour.

    For example, to run a job every time the server is rebooted, add this line in your crontab file.

    @reboot <command-to-execute>

    To remove all cron jobs for the current user:

    $ crontab -r

    There is also a dedicated website named crontab.guru for learning cron jobs examples. This site provides a lot of cron job examples.

    For more details, check man pages.

    $ man crontab

    And, that’s all for now. At this point, you might have a basic understanding of cron jobs and how to use them in real time. More good stuffs to come. Stay tuned!!

    Cheers!


    每天推荐一个 GitHub 优质开源项目和一篇精选英文科技或编程文章原文,欢迎关注开源日报。交流QQ群:202790710;电报群 https://t.me/OpeningSourceOrg

←上一页
1 … 244 245 246 247 248 … 262
下一页→

Proudly powered by WordPress