• 开源镜像
  • 开源沙龙
  • 媛宝
  • 猿帅
  • 注册
  • 登录
  • 息壤开源生活方式平台
  • 加入我们

开源日报

  • 2018年5月18日:开源日报第71期

    18 5 月, 2018

    每天推荐一个 GitHub 优质开源项目和一篇精选英文科技或编程文章原文,欢迎关注开源日报。交流QQ群:202790710;电报群 https://t.me/OpeningSourceOrg


    今日推荐开源项目:《重新体验童年乐趣,JavaScript版NES模拟器——JSNES》GitHub地址

    推荐理由:来不及解释了,先一起玩一局吧!点这里,https://jsnes.fir.sh/

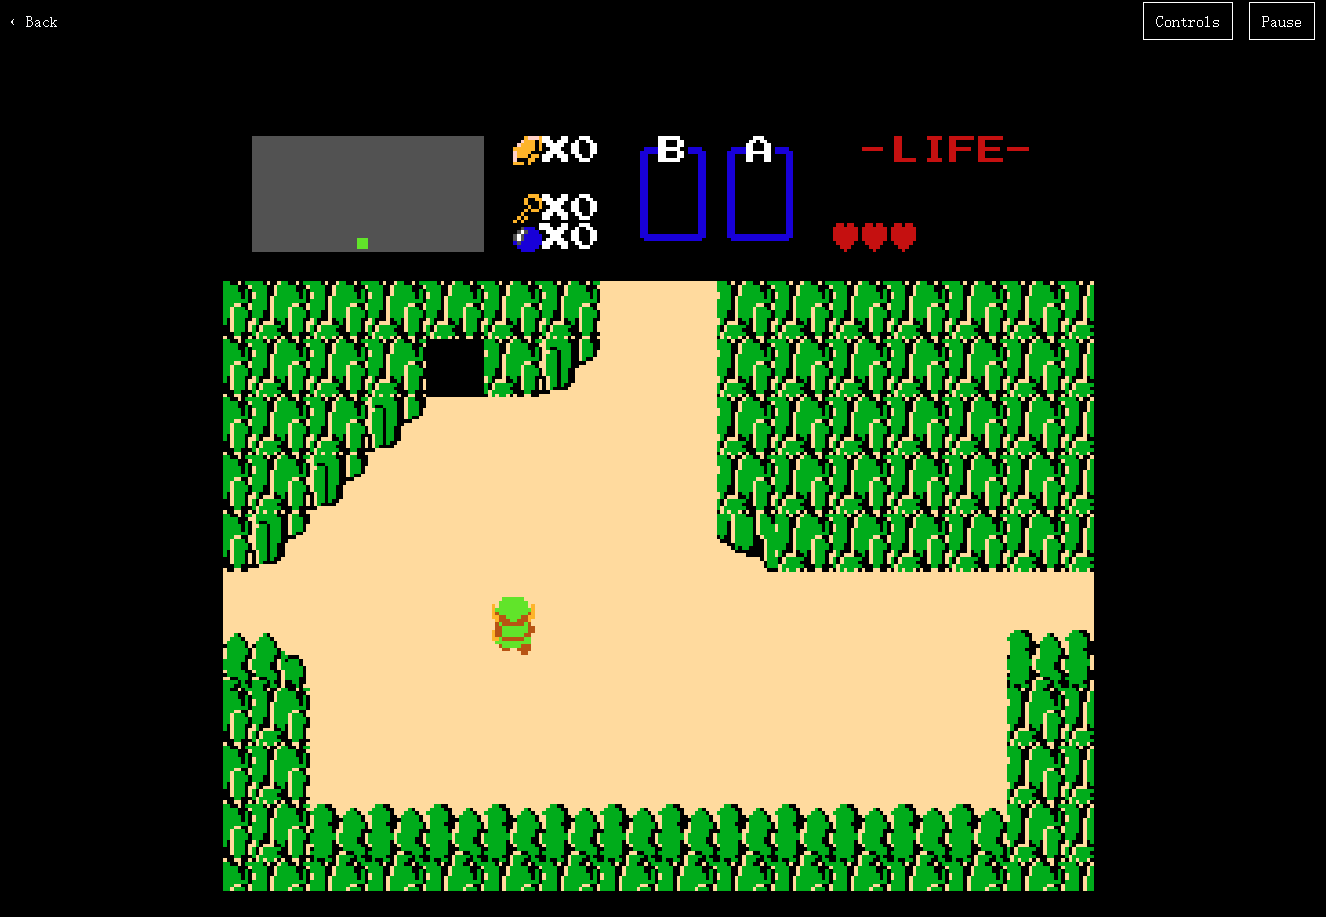
    一款NES 模拟器的js 库,在浏览器上,你便可以重新体验童年的乐趣,具体使用请参考官方文档,另外,官方给出了一个实例网页,就是上面那个地址。在这个网页上,你可以游玩它给出的所有游戏。

    运行塞尔达传说:

    开源周报2018年第6期:程序员的温柔,是为了你周末双休

    今日推荐英文原文:《5 Emacs modes for writers》作者:Scott Nesbitt

    原文链接:https://opensource.com/article/18/5/emacs-modes-writers

    推荐理由:如果你经常使用 Emacs 编辑器,或者 Emacs 操作系统来写东西,那么这5个小工具非常有用,如果你还没开始用 Emacs?那还不赶紧试试!

    5 Emacs modes for writers

    Not all writers work within the confines of a word processor. More than a few of us tap out words in a humble (and sometimes not so humble) text editor.

    When you find a text editor that works for you, and works the way you want it to, you tend to hold onto it like that beaten up leather jacket, like that dog-eared book, or like that collection of old vinyl records.

    For some, that editor is vi or Vim. For others, it’s Nano or Atom. For me, that editor is Emacs. Why? Mainly because of its variety of modes, including some crafted especially for writers.

    Here’s a look at five Emacs modes that writers will find useful.

    Muse

    When I stumbled upon Muse in the early 2000s, it quickly made Emacs my go-to tool for writing and publishing. You can use this mode to create and publish articles, reports, blog posts, web pages, recipes, poems, documentation, and more.

    Writing with Muse is simple. You format your work with a markup language that’s similar to Markdown, with a bit of HTML thrown in for good measure. The markup takes some getting used to, but you should be able to adapt to it quickly.

    Once you’re done writing, you can publish your work as HTML or XHTML, Blosxom, LaTeX, DocBook, PDF, or Texinfo.

    Writing this article with Muse

    Org mode

    Like Emacs itself, people use Org mode for just about everything: from taking notes and maintaining their task lists, to writing and publishing blog posts, to creating presentation slides. And a lot more.

    For writers, Org mode is a great way to outline what they’re working on and to take notes. You can add links between your notes and outline points, which enables you to jump between bits of information when you need to. You can also add tags to the headings in your notes to make it easier to find specific notes when you need them.

    If you need to, you can export your work to a number of formats, including HTML, LaTeX, ODT, and Markdown.

    Org mode

    Flyspell

    No matter how careful you are, typos and misspellings slip through as you’re writing. Because of that, every writer should run his or her work through a spelling checker at least once.

    I often use Aspell when working with text files, but I find it’s faster to check my spelling within Emacs using Flyspell. As you might have guessed from the name, Flyspell is an on-the-fly spelling checker that works as you type.

    Flyspell highlights misspelled or unrecognized words. Click the mouse wheel on one of those words to pop up a list of correct spellings. Select the one that you want, or tell Flyspell to remember or ignore that word.

    Flyspell

    wc Mode

    You might be writing for a print or online publication. You might have swallowed the myth of the optimal length of a blog post. Or you might just be trying to learn to write short. No matter who you’re writing for or why, sometimes you need to make sure your work stays within the boundaries of a word count.

    wc mode does one thing and does it well: It counts the number of words, lines, and characters in what you’re writing. You can also highlight a section of text and get its word count.

    To use wc mode, type M-x wc and the word count of what you’re writing appears in the mini buffer at the bottom of the screen. What could be simpler?

    wc mode

    WriteGood Mode

    Writing clear prose takes a lot of work. One key to writing clearly is choosing the correct words. Equally important is knowing which words not to use. No matter your level of experience as a scribe, you can always use some help with that.

    That’s where WriteGood Mode comes in. It’s designed to find common writing problems—mainly passive wording (which too many writers let slip through), duplicate words, and so-called weasel words. WriteGood mode can also perform readability tests on your writing.

    The list of weasel and passive words that WriteGood mode uses is in the file writegood-mode.el. You can add or delete words by editing the file.

    WriteGood mode

    A few other modes worth mentioning

    If you’re interested in screenwriting (or learning how to do it), you don’t need to spend a lot of money on proprietary tools. Instead, take a look at Fountain mode, which lets you work with Fountain, a markup language for scripts based on Markdown. After you write your scripts, you can export them as HTML, PDF, or Final Draft files.

    Speaking of Markdown, if you write with that language, you’ll want to use Markdown mode. It lets you add formatting using keystrokes or a menu, applies syntax highlighting, and saves your work as HTML. Markdown mode does a lot more, too.

    Distractions are everywhere, including within Emacs. To get rid of those distractions, and concentrate on your words, check out Writeroom mode. It hides menus and the toolbar, puts Emacs into full screen mode, and hides the scrollbar.

    Do you have a favorite Emacs mode that you use when writing? Why not share it by leaving a comment?


    每天推荐一个 GitHub 优质开源项目和一篇精选英文科技或编程文章原文,欢迎关注开源日报。交流QQ群:202790710;电报群 https://t.me/OpeningSourceOrg

  • 2018年5月17日:开源日报第70期

    17 5 月, 2018

    每天推荐一个 GitHub 优质开源项目和一篇精选英文科技或编程文章原文,欢迎关注开源日报。交流QQ群:202790710;电报群 https://t.me/OpeningSourceOrg


    今日推荐开源项目:《代码错误检查器 Glow》GitHub地址

    推荐理由:Glow是一款代码错误检查器,能够明显地标记出代码中的错误。基于Flow对JavaScript代码的检查,Glow能让Flow检查出的错误有明显的标记。

    同时,Glow还有以下特点:

    1.更好的打印,代码突出显示类型的错误;

    2.有交互式的watch模式;

    3.通过使用球体的错误进行过滤

    开源周报2018年第6期:程序员的温柔,是为了你周末双休

    今日推荐英文原文:《Top 8 open source AI technologies in machine learning》作者: Michael J. Garbade

     原文链接:https://opensource.com/article/18/5/top-8-open-source-ai-technologies-machine-learning

    推荐理由:使用这些开源的人工智能你技术,让你的机器学习能力上升一个台阶。

    Top 8 open source AI technologies in machine learning

    Artificial intelligence (AI) technologies are quickly transforming almost every sphere of our lives. From how we communicate to the means we use for transportation, we seem to be getting increasingly addicted to them.

    Because of these rapid advancements, massive amounts of talent and resources are dedicated to accelerating the growth of the technologies.

    Here is a list of 8 best open source AI technologies you can use to take your machine learning projects to the next level.

    1. TensorFlow

    Initially released in 2015, TensorFlow is an open source machine learning framework that is easy to use and deploy across a variety of platforms. It is one of the most well-maintained and extensively used frameworks for machine learning.

    Created by Google for supporting its research and production objectives, TensorFlow is now widely used by several companies, including Dropbox, eBay, Intel, Twitter, and Uber.

    TensorFlow is available in Python, C++, Haskell, Java, Go, Rust, and most recently, JavaScript. You can also find third-party packages for other programming languages.

    The framework allows you to develop neural networks (and even other computational models) using flowgraphs.

    2. Keras

    Initially released in 2015, Keras is an open source software library designed to simplify the creation of deep learning models. It is written in Python and can be deployed on top of other AI technologies such as TensorFlow, Microsoft Cognitive Toolkit (CNTK), and Theano.

    Keras is known for its user-friendliness, modularity, and ease of extensibility. It is suitable if you need a machine learning library that allows for easy and fast prototyping, supports both convolutional and recurrent networks, and runs optimally on both CPUs (central processing units) and GPUs (graphics processing units).

    Initially released in 2007, scikit-learn is an open source library developed for machine learning. This traditional framework is written in Python and features several machine learning models including classification, regression, clustering, and dimensionality reduction.

    Scikit-learn is designed on three other open source projects—Matplotlib, NumPy, and SciPy—and it focuses on data mining and data analysis.

    4. Microsoft Cognitive Toolkit

    Initially released in 2016, the Microsoft Cognitive Toolkit (previously referred to as CNTK), is an AI solution that can empower you to take your machine learning projects to the next level.

    Microsoft says that the open source framework is capable of “training deep learning algorithms to function like the human brain.”

    Some of the vital features of the Microsoft Cognitive Toolkit include highly optimized components capable of handling data from Python, C++, or BrainScript, ability to provide efficient resource usage, ease of integration with Microsoft Azure, and interoperation with NumPy.

    5. Theano

    Initially released in 2007, Theano is an open source Python library that allows you to easily fashion various machine learning models. Since it’s one of the oldest libraries, it is regarded as an industry standard that has inspired developments in deep learning.

    At its core, it enables you to simplify the process of defining, optimizing, and assessing mathematical expressions.

    Theano is capable of taking your structures and transforming them into very efficient code that integrates with NumPy, efficient native libraries such as BLAS, and native code (C++).

    Furthermore, it is optimized for GPUs, provides efficient symbolic differentiation, and comes with extensive code-testing capabilities.

    6. Caffe

    Initially released in 2017, Caffe (Convolutional Architecture for Fast Feature Embedding) is a machine learning framework that focuses on expressiveness, speed, and modularity. The open source framework is written in C++ and comes with a Python interface.

    Caffe’s main features include an expressive architecture that inspires innovation, extensive code that facilitates active development, fast performance that accelerates industry deployment, and a vibrant community that stimulates growth.

    7. Torch

    Initially released in 2002, Torch is a machine learning library that offers a wide array of algorithms for deep learning. The open source framework provides you with optimized flexibility and speed when handling machine learning projects—without causing unnecessary complexities in the process.

    It is written using the scripting language Lua and comes with an underlying C implementation. Some of Torch’s key features include N-dimensional arrays, linear algebra routines, numeric optimization routines, efficient GPU support, and support for iOS and Android platforms.

    8. Accord.NET

    Initially released in 2010, Accord.NET is a machine learning framework entirely written in C#.

    The open source framework is suitable for production-grade scientific computing. With its extensive range of libraries, you can build various applications in artificial neural networks, statistical data processing, image processing, and many others.

    Conclusion

    Before starting to build a machine learning application, selecting one technology from the many options out there can be a difficult task. Therefore, it’s important to evaluate several options before making a final decision.

    Furthermore, learning how the various machine learning technologies work can assist you to make a good decision.

    Apart from the above-listed AI technologies in machine learning, which are you using in your projects? Is there any other framework, library, or toolkit not discussed? Please let us know in the comment section below.


    每天推荐一个 GitHub 优质开源项目和一篇精选英文科技或编程文章原文,欢迎关注开源日报。交流QQ群:202790710;电报群 https://t.me/OpeningSourceOrg

  • 2018年5月16日:开源日报第69期

    16 5 月, 2018

    每天推荐一个 GitHub 优质开源项目和一篇精选英文科技或编程文章原文,欢迎关注开源日报。交流QQ群:202790710;电报群 https://t.me/OpeningSourceOrg


    今日推荐开源项目:《用 Relativ 自己造VR眼睛》GitHub地址

    推荐理由:HTC Vive 随好,然而口袋钱太少!我们买不起 VR 眼镜 所以我们就自己造一个。

    作者在他13岁时加入了机器人技术俱乐部,之后因为看刀剑神域迷上了VR,但是由于不够钱的缘故便打算和俱乐部里仅剩的三人造一个 VR 的头戴式设备。

    Relativ 是基于 wrmhl 和 FastVR 来实现的,wrmhl 让 Arduino(一款方便灵活易上手的开源电子原型平台)和 Unity3D 之间的数据传导毫无延迟,而 FastVR 能够让你快速的创建一款 VR 游戏。这里放上这两个软件的 GitHub 链接

    fastVR:https://github.com/relativty/fastVR-sdk

    wrmhl:https://github.com/relativty/wrmhl

    开源周报2018年第5期:好项目自己动手,加把油何必众筹


    今日推荐英文原文:《Ubuntu Budgie 18.04 Review: The Perfect Blend of Ubuntu and Budgie Desktop》

    作者:Aquil Roshan 原文链接:https://itsfoss.com/ubuntu-budgie-18-review/

    推荐理由:Ubuntu 18.04 LTS 详细评测来了!一直在观望?看看这个就知道该不该装 18.04 了

    Ubuntu Budgie 18.04 Review: The Perfect Blend of Ubuntu and Budgie Desktop

    Brief: Ubuntu Budgie is perhaps the most obscure Ubuntu flavor. In the review of Ubuntu Budgie 18.04, we take a look at the main highlights and user experience of the new release.

    Solus Linux is loved for many reasons. Its flagship desktop environment Budgie, in my opinion, is the biggest reason to love Solus. While there was no shortage of desktop environments in the Linux domain, the arrival and the acceptance of Budgie desktop environment by a widespread audience, clearly showed that there was a huge scope (or even a need?) for a modern, intuitive and non-intrusive desktop environment.

    But all is not well in Solus land. Solus unlike a majority of Linux distros is not based on any other parent distro. Solus is written from scratch and has it’s own package management system and software repository. I loved Solus 3. But as an ardent Linux user, I need the latest packages and support from newer software, which, at the moment is not that good on Solus. The software repository is not as vast as that of Ubuntu. Also, the package manager itself needs to evolve.

    So for me, the best way to experience Budgie was to go with Ubuntu Budgie. The elegance of Budgie desktop on top of a tried and tested solid base. So in this article, we’ll be having a look at Ubuntu Budgie 18.04. Let’s get into it right away.

    Ubuntu Budgie 18.04 Review

    We have also made a video showcasing Ubuntu 18.04 features in action. I would recommend watching the video as well as subscribing to our YouTube channel for more Linux videos.

    1. The Interface

    The Budgie desktop environment in Ubuntu Budgie comes with its own twist. Budgie, out of the box, is set up slightly different than Solus. Solus 3 has its primary panel located at the bottom of the screen. It also provides Windows like bottom bar icons.

    Budgie Home

    Ubuntu Budgie’s desktop looks more like a GNOME desktop. The main panel is placed on the top. A clock at the center of the panel and notifications on the top right. Yup, it does look like GNOME.

    The notification sidebar slides in from the right side of the screen. The sidebar is downright stunning. Everything you need in one place.  It also houses the applets, which you can customize as per your needs. It’s quick to use. And stays completely out of your way when you don’t need it. Once you start using it, You won’t be able to live without it.

    You have a minimal Plank dock on the left side of the desktop, and who doesn’t love Plank?

    The default theme is pretty. A gorgeous set of desktop wallpapers is included. Budgie desktop has rather modest animation effects. The animations do not try to catch your attention but are graceful in themselves.

    Budgie Wallpapers

    And as far as usability is concerned, Budgie is simple. You need not spend a lot of time getting to know how everything works. One look at the desktop and you’ll pretty much have a rough idea of where everything is.

    2. Out of the box software

    All the essentials are included in the ISO file. LibreOffice suite, Rhythmbox music player, GNOME MPV, a good number of casual games come right out of the box. Chromium is the default browser in Ubuntu Budgie. The general essentials like the calculator and calendar are all present.

    Ubuntu Software is the default software store on Ubuntu Budgie 18.04. Anything and everything you need can be installed from there with just a click.  If you need something that’s not found on the Software Store, you can install them by following the same installation instructions as that for Ubuntu.

    3. Performance

    On my computer, Ubuntu Budgie 18.04 visibly outperformed the standard Ubuntu 18.04. This, of course, can be credited to the fact that Budgie desktop environment is much more lighter than GNOME desktop environment and as a result, is faster.

    Of all the flavors available, for me at least, Budgie version strikes the sweet spot between speed and aesthetics.

    Since Ubuntu Budgie is still Ubuntu under the hood, an unquestionable stability can be expected. The repositories have thoroughly tested packages which deliver a high degree of stability above else.

    Ubuntu Budgie 18.04 is ready to be used as your daily driver. It’s dependable.

    4. Customization

    Customizability is the unspoken essential requirement of every desktop Linux Enthusiast. I get it.

    Ubuntu Budgie makes customization very simple. An application called ‘Budgie Themes’ provides 8 different theme setups. You can choose the one that goes with your specs or whatever and the theme, icon packs are fetched and installed automatically. The hassle of adding PPAs, updating cache, everything is taken care of by the OS.

    Budgie Themes

    The presets are all good looking and the desktop looks like a work of art on any theme.

    An applet store is also present which provides a range of applets for you to download and use. Again, hassle-free installation.

    Budgie Applets

    The main panel can be moved to the bottom if that’s your thing. The items in it can be removed, added and configured to be where you want them to be.

    5. Gaming

    Ubuntu Budgie is officially supported by Steam, which brings more than a thousand games to Linux. Amazing titles such as Team Fortress 2, Counter-Strike: Global Offensive, Dota 2, Rocket League and many more can be installed through Steam.

    A vast number of free games are available in the Ubuntu repositories. There are some good time killers, spread across all the categories. 0 A.D, Xonotic, Alien-Arena to name some.

    And you can play a good number of Windows games on Ubuntu Budgie with the help of PlayOnLinux and Wine. Now not all the games work this way, but it’s something you might find useful. I sometimes play some NFS Most Wanted and it works flawlessly.

    6. Installation

    Ubuntu Budgie 18.04 has the same installation procedure as that of Ubuntu 18.04. Boot into a live session, click on  ‘Install Ubuntu Budgie 18.04’ and follow through. It’s rather straightforward.

    7. Getting help

    A very strong support for Ubuntu exists on the internet. AskUbuntu is one such website where any question you might have will be answered by the community (if the same question has not already been raised and answered).

    Generally, solutions for Ubuntu will also be applicable to ubuntu Budgie. I also recommend reading this list of things to do after installing Ubuntu 18.04.

    Wrapping up

    Budgie desktop plus Ubuntu is an incredible combination. It’s kind of like Mint, but different. Ubuntu Budgie provides a superior computing experience. It’s gorgeous and dependable. Like me, if you too are not a fan of the new Ubuntu Gnome version, I highly recommend you try the Budgie version. You’ll fall in love with it. You can download Ubuntu Budgie here.

    Do share your thoughts on Ubuntu Budgie 18.04 with us. Use the comments section below. And don’t forget to share this article. Cheers.


    每天推荐一个 GitHub 优质开源项目和一篇精选英文科技或编程文章原文,欢迎关注开源日报。交流QQ群:202790710;电报群 https://t.me/OpeningSourceOrg

  • 2018年5月15日:开源日报第68期

    15 5 月, 2018

    每天推荐一个 GitHub 优质开源项目和一篇精选英文科技或编程文章原文,欢迎关注开源日报。交流QQ群:202790710;电报群 https://t.me/OpeningSourceOrg


    今日推荐开源项目:《后端设计模式指南 Awesome Scalability》GitHub地址

    推荐理由:本项目提供了大量精选的阅读材料,旨在帮助后台开发者们能够借助项目中各个文献的思路做出一个具有延展性,可用性,稳定性的后台。这个概念虽然模糊,但是借由著名工程师(Martin Fowler,Robert C. Martin,Tom White等)和高质量资源(highscalability.com,infoq.com等)的诠释,相信大家能从中理解并学到有用的东西。

    开源周报2018年第5期:好项目自己动手,加把油何必众筹

    项目将各类文献整理,涵盖各个方面。主要分为原则、可扩展性、稳定性、其他方面、会谈、图书七个板块。包括了异常处理,数据库策略等内容。

    项目欢迎有意者的参与,贡献是非常受欢迎的!有兴趣的朋友可以一试。


    今日推荐英文原文:《3 useful things you can do with the IP tool in Linux》作者:Dave Neary

    原文链接:https://opensource.com/article/18/5/useful-things-you-can-do-with-IP-tool-Linux

    推荐理由:IP 工具是 GNU/Linux 系统中非常常用的一个命令,怎么用它查看你的ip地址,路由表呢?

    3 useful things you can do with the IP tool in Linux

    It has been more than a decade since the ifconfig command has been deprecated on Linux in favor of the iproute2 project, which contains the magical tool ip. Many online tutorial resources still refer to old command-line tools like ifconfig, route, and netstat. The goal of this tutorial is to share some of the simple networking-related things you can do easily using the ip tool instead.

    Find your IP address

    [dneary@host]$ ip addr show
    [snip]
    44: wlp4s0: <BROADCAST,MULTICAST,UP,LOWER_UP> mtu 1500 qdisc mq state UP group default qlen 1000
    link/ether 5c:e0:c5:c7:f0:f1 brd ff:ff:ff:ff:ff:ff
    inet 10.16.196.113/23 brd 10.16.197.255 scope global dynamic wlp4s0
    valid_lft 74830sec preferred_lft 74830sec
    inet6 fe80::5ee0:c5ff:fec7:f0f1/64 scope link
    valid_lft forever preferred_lft forever

    ip addr show will show you a lot of information about all of your network link devices. In this case, my wireless Ethernet card (wlp4s0) is the IPv4 address (the inet field) 10.16.196.113/23. The /23 means that there are 23 bits of the 32 bits in the IP address, which will be shared by all of the IP addresses in this subnet. IP addresses in the subnet will range from 10.16.196.0 to 10.16.197.254. The broadcast address for the subnet (the brd field after the IP address) 10.16.197.255 is reserved for broadcast traffic to all hosts on the subnet.

    We can show only the information about a single device using ip addr show dev wlp4s0, for example.

    Display your routing table

    [dneary@host]$ ip route list
    default via 10.16.197.254 dev wlp4s0 proto static metric 600
    10.16.196.0/23 dev wlp4s0 proto kernel scope link src 10.16.196.113 metric 601
    192.168.122.0/24 dev virbr0 proto kernel scope link src 192.168.122.1 linkdown

    The routing table is the local host’s way of helping network traffic figure out where to go. It contains a set of signposts, sending traffic to a specific interface, and a specific next waypoint on its journey.

    If you run any virtual machines or containers, these will get their own IP addresses and subnets, which can make these routing tables quite complicated, but in a single host, there are typically two instructions. For local traffic, send it out onto the local Ethernet, and the network switches will figure out (using a protocol called ARP) which host owns the destination IP address, and thus where the traffic should be sent. For traffic to the internet, send it to the local gateway node, which will have a better idea how to get to the destination.

    In the situation above, the first line represents the external gateway for external traffic, the second line is for local traffic, and the third is reserved for a virtual bridge for VMs running on the host, but this link is not currently active.

    Monitor your network configuration

    [dneary@host]$ ip monitor all
    [dneary@host]$ ip -s link list wlp4s0

    The ip monitor command can be used to monitor changes in routing tables, network addressing on network interfaces, or changes in ARP tables on the local host. This command can be particularly useful in debugging network issues related to containers and networking, when two VMs should be able to communicate with each other but cannot.

    When used with all, ip monitor will report all changes, prefixed with one of [LINK] (network interface changes), [ROUTE] (changes to a routing table), [ADDR] (IP address changes), or [NEIGH] (nothing to do with horses—changes related to ARP addresses of neighbors).You can also monitor changes on specific objects (for example, a specific routing table or an IP address).

    Another useful option that works with many commands is ip -s, which gives some statistics. Adding a second -s option adds even more statistics. ip -s link list wlp4s0 above will give lots of information about packets received and transmitted, with the number of packets dropped, errors detected, and so on.

    Handy tip: Shorten your commands

    In general, for the ip tool, you need to include only enough letters to uniquely identify what you want to do. Instead of ip monitor, you can use ip mon. Instead of ip addr list, you can use ip a l, and you can use ip r in place of ip route. Ip link list can be shorted to ip l ls. To read about the many options you can use to change the behavior of a command, visit the ip manpage.


    每天推荐一个 GitHub 优质开源项目和一篇精选英文科技或编程文章原文,欢迎关注开源日报。交流QQ群:202790710;电报群 https://t.me/OpeningSourceOrg

←上一页
1 … 242 243 244 245 246 … 262
下一页→

Proudly powered by WordPress